
In this tutorial I will explain how a simple vertex displacement shader works for animating fishes. A shader that is included on my unity tool called Fish Flock.
I will assume that you have some experience with coding shaders on Unity, at least a basic idea of how it works and some understanding on how shaders works.
Simple requirements and setup for the project:
- I’m using Unity 2019.3.15f1. I think any 2019.3.X version will do.
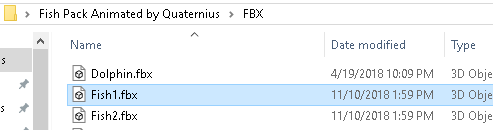
- Download a cool fish asset pack from here.
- We will be using Unity’s built-in renderer.
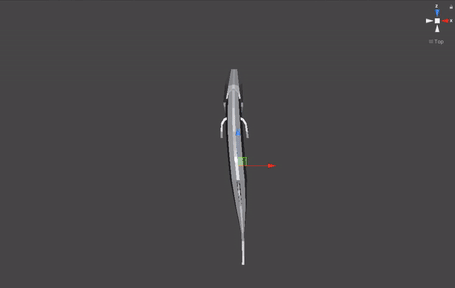
- After downloading the cool asset pack you can grab the Fish1 from the FBX folder and import on your project.
Let’s create a new Standard Surface Shader and call it FishVertexAnimation.

The shader will basically look like this:
Shader "Custom/FishVertexAnimation"
{
    Properties
    {
        _Color ("Color", Color) = (1,1,1,1)
        _MainTex ("Albedo (RGB)", 2D) = "white" {}
        _Glossiness ("Smoothness", Range(0,1)) = 0.5
        _Metallic ("Metallic", Range(0,1)) = 0.0
    }
    SubShader
    {
        Tags { "RenderType"="Opaque" }
        LOD 200

        CGPROGRAM
        // Physically based Standard lighting model, and enable shadows on all light types
        #pragma surface surf Standard fullforwardshadows

        // Use shader model 3.0 target, to get nicer looking lighting
        #pragma target 3.0

        sampler2D _MainTex;

        struct Input
        {
            float2 uv_MainTex;
        };

        half _Glossiness;
        half _Metallic;
        fixed4 _Color;

        // Add instancing support for this shader. You need to check 'Enable Instancing' on materials that use the shader.
        // See https://docs.unity3d.com/Manual/GPUInstancing.html for more information about instancing.
        // #pragma instancing_options assumeuniformscaling
        UNITY_INSTANCING_BUFFER_START(Props)
            // put more per-instance properties here
        UNITY_INSTANCING_BUFFER_END(Props)

        void surf (Input IN, inout SurfaceOutputStandard o)
        {
            // Albedo comes from a texture tinted by color
            fixed4 c = tex2D (_MainTex, IN.uv_MainTex) * _Color;
            o.Albedo = c.rgb;
            // Metallic and smoothness come from slider variables
            o.Metallic = _Metallic;
            o.Smoothness = _Glossiness;
            o.Alpha = c.a;
        }
        ENDCG
    }
    FallBack "Diffuse"
}
Now, right at the part where is declared the pragma definitions, we will setup our own vertex function:
CGPROGRAM
// Physically based Standard lighting model, and enable shadows on all light types
#pragma surface surf Standard fullforwardshadows vertex:vert
Now we can declare our vertex function called vert. Because that’s what we specified with vertex:vert. You can call it whatever you want.
void vert(inout appdata_full data, out Input input)
{
}
Now let’s store our vertex position coming from the data in a local variable:
void vert(inout appdata_full data, out Input input)
{
    float3 vertexPosition = data.vertex.xyz;
}
Since the vertex variable is a float4 and we only want a float3 I just grabbed the first 3 floats (xyz) from the float4 (xyzw) into a float3. When coding on HLSL there are these “variables” you can grab from float structures so you can grab only the fields you need to.
Here is some more information about the data variables on the vertex function, and about these fields (that are not really fields).
The vertex displacement calculation itself is quite simple, but first we need some vaiables to adjust the displacement to our needs.
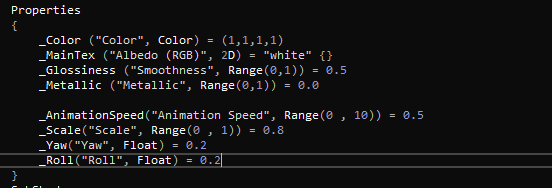
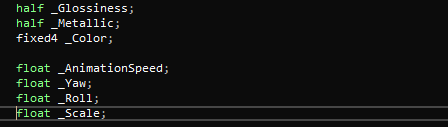
These last four variables that I added to the Properties block will be useful to handle the speed, scale, yaw and roll of our animation.
A quick explanation of these variables:
- Animation Speed: The speed of the swimming animation effect
- Scale: It is basically the intensity of the Yaw and Roll
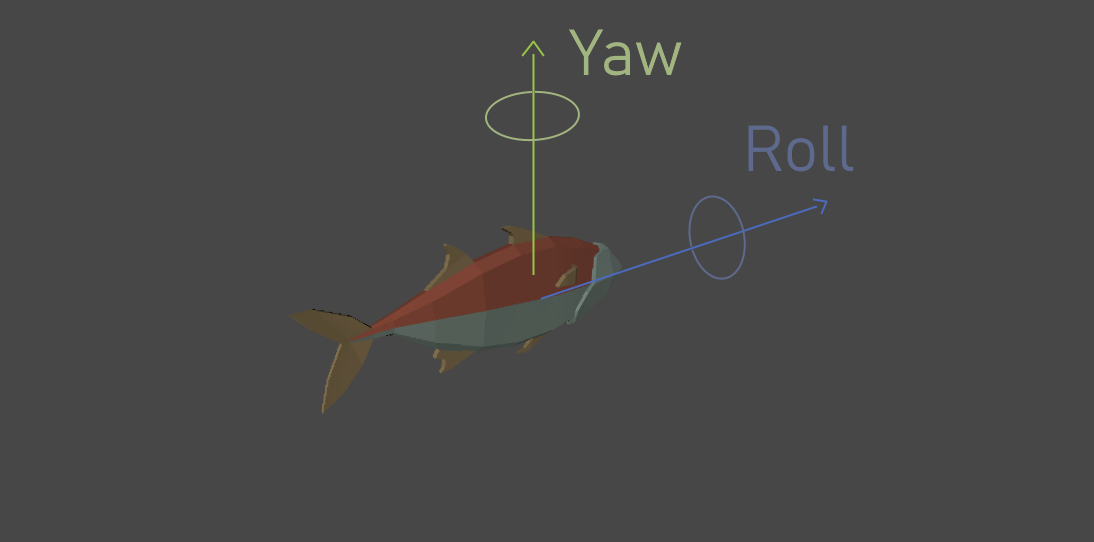
- Yaw: Controls the usual swimming effect where the fish makes a “ping-pong” effect with his head to right/left
- Roll: Controls the wobbling the fish does in the X rotation axis
So now that you know what each variable does, let’s see how to calculate that. But before that, we need one thing before applying this effect on our vertices: to initialize the Input struct that is showed as a parameter on the vert function.

This is a required call so the Input struct is initialized and the compiler won’t complain about uninitialized output values.
So, now let’s apply the vertex displacement using our variables:
void vert(inout appdata_full data, out Input input)
{
    UNITY_INITIALIZE_OUTPUT(Input, input);

    float3 vertexPosition = data.vertex.xyz;
    vertexPosition +=   ((sin(((_Time.w * _AnimationSpeed)
                        + (vertexPosition.z * _Yaw)
                        + (vertexPosition.y * _Roll))) * _Scale)
                        * float3(1, 0, 0));

    data.vertex.xyz = vertexPosition;
}
It is simple as that, just a line of adding and multiplying values.
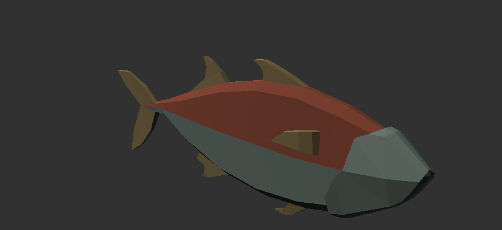
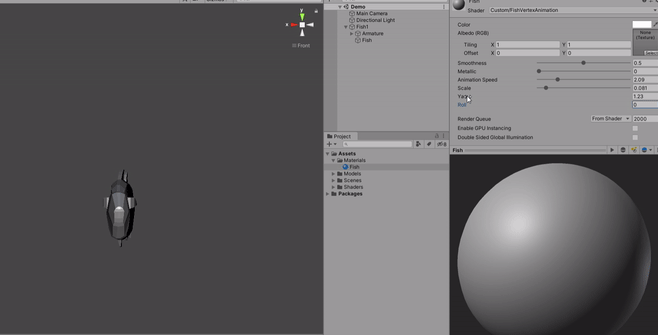
Now create a material called Fish.

And apply that to our fish (It seems that this model uses 3 materials for it’s colors, if you apply only one it will not render all parts properly, just use the same material 3 times. You can change it later to other materials with different colors).
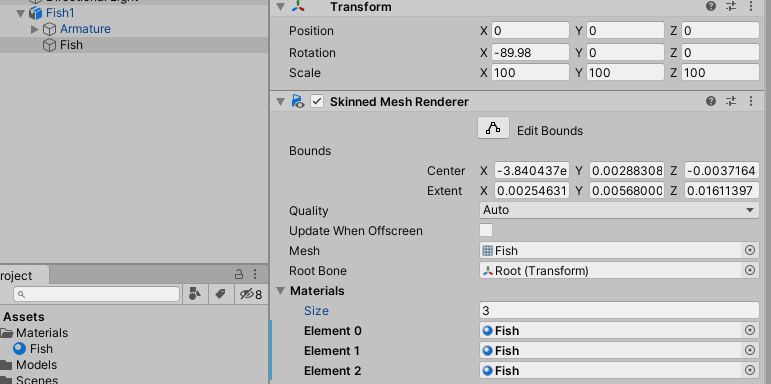
Assing our shader to the new material created.

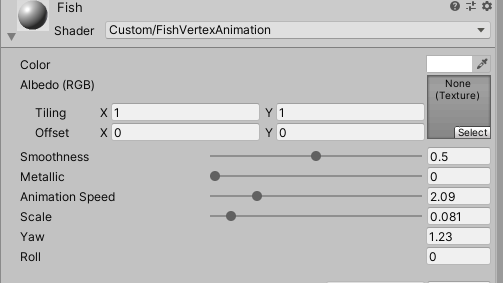
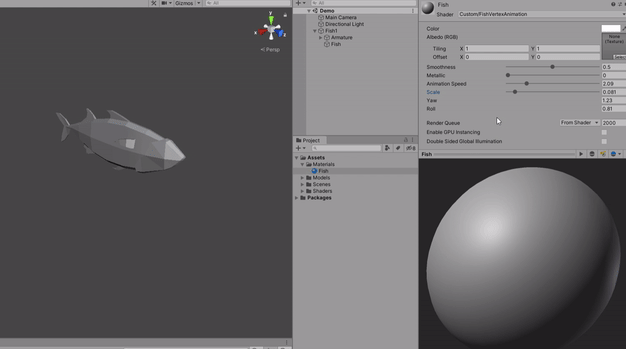
Now this is how our material will look like. I already modified some variables values so you can use the same values if you want.
Now let’s see what our formula does:
The sin function will calculate the SINE value of all this part of the code:
((_Time.w * _AnimationSpeed) + (vertexPosition.z * _Yaw) + (vertexPosition.y * _Roll))Here we use all of our variables to calculate the swimming effect. First we use the _AnimationSpeed multiplied by _Time.w . We get the w from the built-in _Time variable because it is a float field. For more info take a look here. But basically it contains this info:

The field we get is actually time * 3, but that is relative to what you are trying to achieve in different scenarios with your shader.
Moving forward, next we calculate the yawing of the effect using the _Yaw variable, this will be multiplied by the Z axis from the current vertex position.
Next we use the _Roll variable that will apply a distortion on the vertices based on the Y axis of the current vertice positon, like a smooth inclination on the rotation of the Z axis.
So it is really a combintion of both the Yaw and Roll fields that will give the swimming effect you want.
Now, the result of the sin that is calculated based on the result of this formula that we just saw, is multiplied by the _Scale property.
vertexPosition += ((sin(...)) * _Scale) * float3(1, 0, 0));The scale will dictate how intense it is the sine wave.
And to wrap it up, all of the results (including multiplying by the _Scale variable) will be also multiplied by a float3(1, 0, 0), which means a forward vector. This effect will apply only to the Z value of the vertexPosition because when it adds the vertexPosition value only the Z value will contain anything to be added on the vertexPosition variable that is a float3.
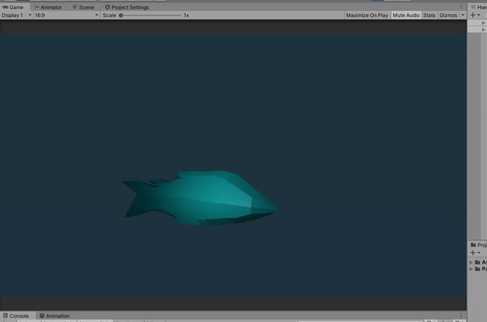
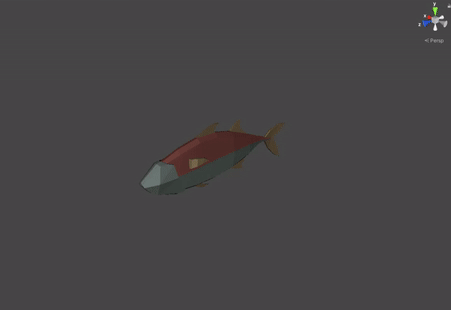
Here is the final result.
The project of this tutorial is available here on Github.

